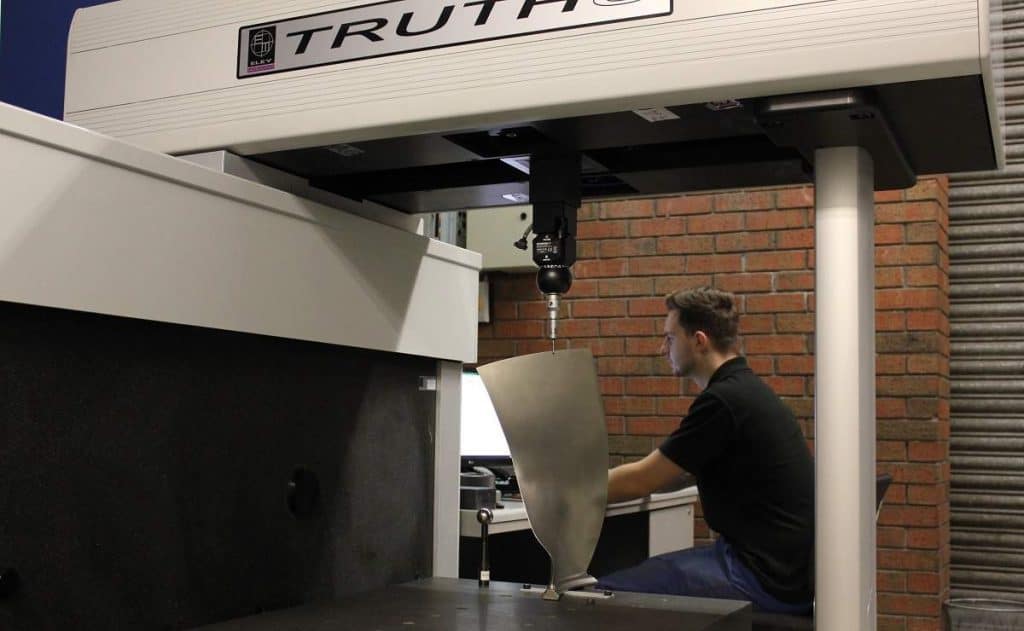
There are four main types of coordinate measuring machine (CMMs): bridge, cantilever, gantry and horizontal arm. The one you choose will be determined by what you wish to use it for. All CMMs have three orthogonal axes, X, Y and Z which operate in a 3D coordinate system. Some use contact probes whereas others use non-contact probes. All CMMs relay data calculated to check on the accuracy of the component being measured.
In this post, we look at the different types of coordinate measuring machine and their applications.

Bridge CMM
A typical 3D Bridge CMM allows a probe movement along the three axes, which are orthogonal to each other in a three-dimensional cartesian coordinate system. Each axis sensors monitor the position of the probe with micrometre precision. The contact point of the position sensors allows the measuring of the object’s surface and is repeated to produce a ‘point cloud’ which describes the surface areas of interest.
Bridge machines are known as the workhorses of CMMs and have a fairly basic structure which is simple to build. Bridge machines are also relatively low cost to build and maintain over a long-term period.
There are pros and cons in the function of a Bridge CMM. For example, it can be quite difficult to access the part being measured because of the uprights holding the X-axis beam. Heavy components may require a lift truck or crane to place them on the machine. This, in turn, could lead to the machine itself getting knocked. Having said that, for measuring machined parts with higher tolerances, there is no better machine for accuracy than the Bridge CMM.
We offer two types of Bridge machine:
The Millennium Series Bridge Coordinate Measuring Machine combines top class performance with a high degree of accuracy. It is a fully constrained design, has powerful zero drive units and allows for rapid machine movements without compromising on accuracy.
The Truth S Bridge Coordinate Measuring Machine can scan regular and irregular contours taking in thousands of data points in seconds while also offering conventional CMM touch-trigger technology.
Cantilever CMM
Cantilever CMMs are generally used for measuring relatively small parts, providing open access to the operator on three sides. Unlike the bridge style cmm, the head is only attached to one side of the rigid base.
The column’s large support base combined with the low weight means that cantilever CMMs move quickly. Due to the high level of accuracy and low measurement uncertainty, cantilever CMMs are used predominantly for measuring gauges and master parts.
A shop floor cantilever CMM is a popular choice because it lends itself to automatic loading and unloading.
Gantry CMM
Gantry CMMs are similar in structure to Bridge CMMs, but are ordinarily a lot larger. The gantry style has the bridge raised on pillars which increases the overall measuring volume. Most gantry CMMs must have a substantial foundation and are usually mounted directly to the floor. This similarity in structure to the Bridge CMM means that a gantry machine also has a high level of accuracy.
The measuring range of a gantry CMM varies from 1x2x1m XYZ to 4x10x3m XYZ, and it is possible to have even larger, custom made units built.
There are many significant advantages of Gantry CMMs over the conventional Bridge cmm. It is far safer to load heavy parts as they can be loaded directly on the floor. Access for the programmer is easier meaning programming is made much simpler. It is easy to insert surface plates for smaller components, which makes measurements less time consuming for the operator.
Of course, there are some disadvantages to a Gantry CMM as well. The cost of building a foundation is significantly higher. A Gantry CMM is not portable, and they take up a lot of space.
Gantry CMMs are particularly prevalent in the aerospace industry due to the large size of components that still require an extremely high degree of accuracy.
All Eley Metrology Gantry CMMs are custom built. We can create a bespoke design to suit your requirements and business demands.
Horizontal Arm CMM
The design of a Horizontal Arm CMM means that they are useful when measuring large surfaces or difficult to reach features.
There are two basic types of Horizontal Arm CMMs. The plate mounted version, where the column is mounted on a large surface plate. While some are top mounted, most are side mounted as it is a far more accurate and stable way to get the desired measurements.
The other version is a runway mounted CMM that runs on a dedicated beam with no integral plate. The top mounted design provides maximum flexibility for measuring large components. The dual arm allows for both sides of an object to be measured simultaneously.
Although the horizontal arm CMMs are the least accurate of the four types, they are the best for measuring large thin-walled/sheet metal type components. When measuring large components requiring ope tolerances, the horizontal arm is by far the most cost-effective.
The Eley Metrology Crown Windley series of Horizontal Arm CMMs represent state of the art technology that can be used for inspection, quality control or quality assurance. We can also build custom made, bespoke designs where required.
The main application for our Crown Windley Horizontal Arm CMM is DCC layout and measurement of large castings and fabrications, pressings, automotive panels and patterns, digitising of patterns, moulds and automotive panels including body in white and scale and full-size models.
In Conclusion
A major source of error in metrology is human error, caused by personnel using measurement devices incorrectly. A coordinate measuring machine significantly reduces the risk of mistakes and greatly increases the level of accuracy.
Generally speaking, Cantilever CMMs are often the most accurate but are the least flexible. Bridge and Gantry CMMs have good accuracy and are semi-flexible. Horizontal Arm CMMs offer the least accuracy but the most flexibility. However, the level of accuracy on all types of coordinate measuring machine is still far higher than it would be without one, making production much more cost effective.

Jeff Eley is the founder and managing director of Eley Metrology, a leading company in the precision measurement industry. With decades of experience in metrology, Jeff has established himself as a respected figure in the field. Under his leadership, Eley Metrology has become renowned for its expertise in coordinate measuring machines (CMMs), digital height gauges, and granite metrology products. Jeff’s vision has driven the company to develop innovative solutions, including custom-designed CMMs and the flagship long-bore measurement machine (LBM). His commitment to excellence and customer-centric approach has positioned Eley Metrology as a trusted provider of high-precision measurement tools and services for industries such as aerospace, automotive, and manufacturing.

